







From box to first light in four steps.
Install, power, and pair your LIFX Everday Permanent Lights. Follow the steps in order, or jump to the part you need. Everything below works on iOS and Android.
●60-120 Min Install●No Hub Required●Works With Matter
Everyday Permanent Light Setup
04 steps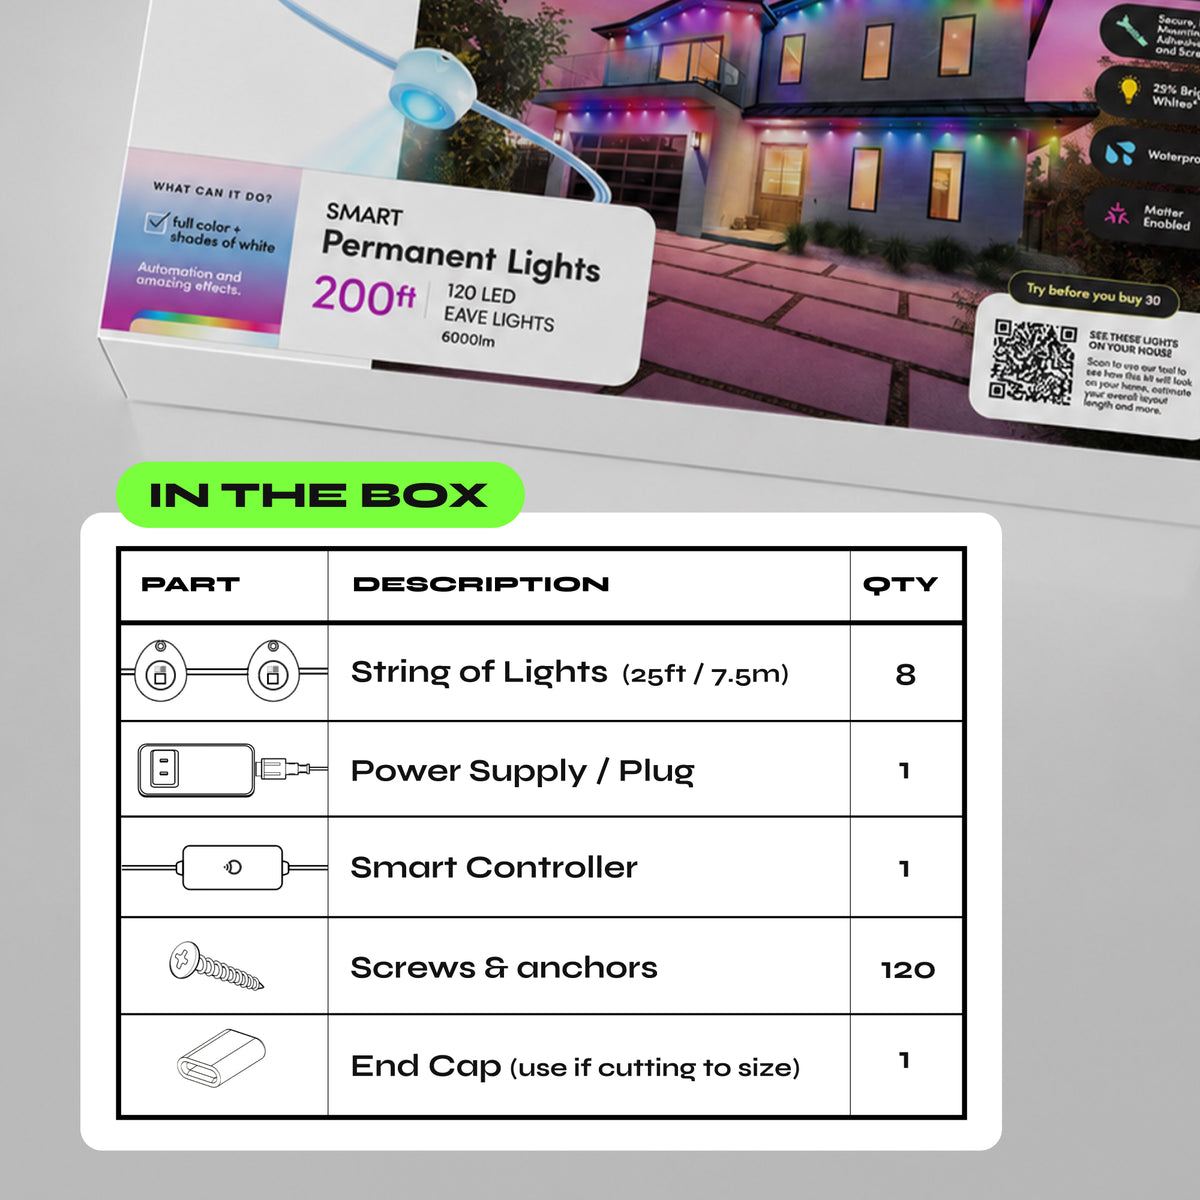
Everything you need to install and onboard your Permanent Lights is included in the box.
In the box:
- 200ft of string lights with 120 individual lights, made up of 8 x 25ft lengths
- 6ft power supply
- 4ft controller
- End cap, to seal the end of the string after cutting
- Screw-in and adhesive mounting options
You’ll Need:
- A Phillips screwdriver
- A smartphone (iOS 18.0+ or Android 8.1+)
- The LIFX app (download from App Store or Google Play
- A 2.4 GHz Wi-Fi network (Most smart devices require 2.4 GHz. If your router combines 2.4 GHz and 5 GHz, that’s usually fine.)
- Your Wi-Fi password
Important Notes:
- Keep your phone near the light during setup.
- Make sure Bluetooth is enabled.
- Ensure your phone is connected to the same Wi-Fi network you want the light to use.
Before you start: test indoors first
- Connect all pieces together and add the light to your app before mounting outside.
- If any pieces aren’t lighting up, press the button on the controller for 2–3 seconds. A light will run the full length of the string as it detects and counts all connected pieces.
- Unplug the product from the outlet before assembling, disassembling, installing, relocating, servicing or cleaning it.
Mounting method
- Short-term: clean the surface, peel the adhesive backing, and press each light firmly in place for at least 30 seconds.
- Permanent (recommended): use both the adhesive backing and the included mounting screws. Use the adhesive to tack each light in position, then secure it with a screw every 19.7". Don’t overtighten the screws.
Installation steps
- Plan your layout. Measure the space and mark where each light will sit using chalk or masking tape.
- Connect the power supply (6ft), the controller (4ft) and the 8 x 25ft lengths of lights in sequence. Screw all connections firmly so they stay watertight.
- Make sure any unused female connector is capped, with the end cap screwed in completely.
- Mount the lights using both the adhesive backing and the mounting screws.
- Plug the controller into a GFCI-protected outdoor outlet.
Power and length
- This kit includes the full 200ft (8 x 25ft lengths) and uses up to 120W in total.
- To shorten the string, see Custom length below.
- Don’t overload. Don’t exceed the lowest maximum wattage shown on the tag of any extension cord you use.
Custom length (optional)
- Unplug the product completely before cutting.
- Decide where to shorten the string and cut the wire, removing the excess section.
- Seal the cut end with the included end cap.
Tips and safety
- Use only three-wire outdoor extension cords with a three-prong grounding plug, such as cord types SEW, SEOW, SEOOW, SOW, SOOW, STW, STOW, STOOW, SJEW, SJEOW, SJEOOW, SJW, SJOW, SJOOW, SJTW, SJTOW or SJTOOW.
- Keep at least 25ft from pools and spas. Keep all plugs and receptacles dry. Don’t submerge.
- Don’t use near water or where water may accumulate.
- Don’t secure with staples, nails or other sharp or conductive materials, and don’t place on sharp hooks. Install only with the mounting means provided. Don’t damage the wire.
- Don’t hang ornaments or other objects from the cord, wire or lights.
- Don’t let the lights rest on the supply cord or any wire.
- Don’t close doors or windows on the product or extension cords, as this can damage the wire insulation.
- Don’t cover the lights with cloth, paper or any material that isn’t part of the product.
- Keep lights away from heaters, fireplaces, candles and other heat sources, and away from combustible surfaces.
- Install out of the reach of children.
- Don’t replace the attachment plug. It contains a safety fuse. Discard the product if the plug is damaged.
- Adhesive mounting may cause surface damage when removed and isn’t recommended for brick or concrete.
- Use the product only for its intended purpose.
- To factory reset, press and hold the controller button for 5–7 seconds.
Select your device below to get step-by-step setup instructions tailored to your phone. We recommend using the Matter QR code method for the quickest and most reliable connection — you'll find the QR code in your product manual, or printed on the back of your device.
Choose your OS
On iOS, you can set up in two ways
We recommend Matter for the most reliable setup. Use Wi-Fi if you've lost the QR code or can't access it.
iOS Onboarding via Matter QR code
- Plug in the light and power it on.
- Open the LIFX app and tap the + icon in the bottom right.
- Tap New Product, then New Light.
- Tap Scan QR Code and use the camera to scan. Alternatively, type the 11-digit Matter code from the product (or Manual).
- Tap Add to LIFX and Choose Home from the list.
- Wait for the Home app to connect to the light.
- Select a Location (e.g. Bedroom) and give it a Name (e.g. Bedside Lamp).
- You're all set.
iOS Onboarding via WiFi
- Plug in the light and power it on.
- Open the LIFX app and tap the + icon in the bottom right.
- Tap New Product, then New Light.
- Tap Set Up Device Manually.
- Go to your phone's Wi-Fi Settings:Matter: From Other Networks, select the LIFX Light.HomeKit: LIFX appears under Set Up New Device; after 15 minutes it moves to Other Networks. Select the LIFX Light from there.
- Return to the LIFX app.
- Select your Wi-Fi and enter the password.
- Wait for the light to connect via Wi-Fi (up to a minute).
- Finish setup by selecting a Group and giving it a Name.
- Opt in or out of any Suggested Routines.
- You're all set.
On Android, you can set up in two ways
We recommend Matter for the most reliable setup. Use Wi-Fi if you've lost the QR code or can't access it.
Android onboarding via Matter QR code
- Plug in the light and power it on.
- Open the LIFX app and tap the + icon in the bottom right.
- Tap New Product, then New Light.
- Tap Scan QR Code and use the camera to scan. Alternatively, type the 11-digit Matter code from the product (or Manual).
- Tap Add to LIFX and Choose Home from the list.
- Wait for the Home app to connect to the light.
- Select a Location (e.g. Bedroom) and give it a Name (e.g. Bedside Lamp).
- You're all set.
Android onboarding via Wi-Fi
- Plug in the light and power it on.
- Open the LIFX app and tap the + icon in the bottom right.
- Tap New Product, then New Light.
- Tap Set Up Device Manually.
- Select your new LIFX light when it appears.
- Select your Wi-Fi and enter the password.
- Wait for the light to connect via Wi-Fi (up to a minute).
- Finish setup by selecting a Group and giving it a Name.
- Opt in or out of any Suggested Routines.
- You're all set.